Import Mapping Files (KML, SHP), Assign Paddock Names and Coordinate System
Import polygons
- Open Adviser software
- Open required Client File
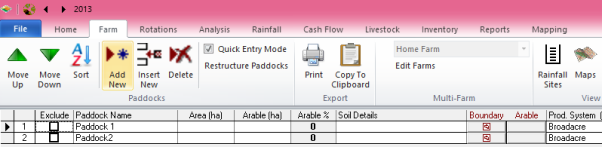
- Click on Farm tab
- Click on Maps (in toolbar)
- Click on square under “Boundary”
- Click on Import
- Click on Open
- Navigate to your Farm file created from Google Earth or other (program automatically opens at Maps folder)
- WebConnect users. The simplest way for you to get your Mapping file from your computer to WebConnect is to copy and paste. Locate your file on your own computer (under Documents for example) and right click > Copy (or Ctrl C). Go back to Adviser WebConnect and click in the white space in the folder that has opened in step 7, hold Ctrl and click V on your keyboard to paste. You can now continue with steps below.
- Left click on correct file
- Click Open
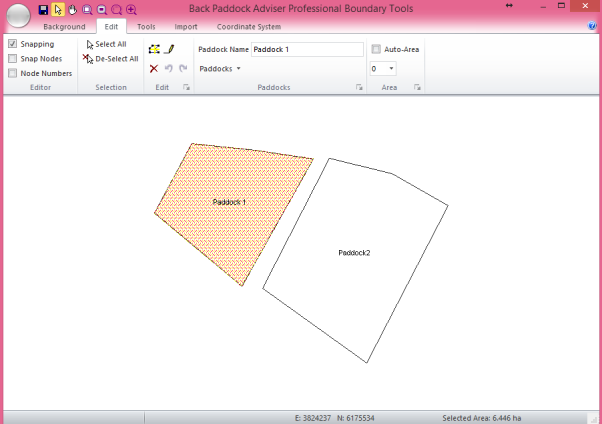
- Click Edit
We are now ready to tell the program which polygon belongs to which paddock. We can assign existing paddock names, or create new paddocks as we go through the Mapping function. Areas can also be calculated and inserted from the polygon information.
Allocate Paddock Names to each Polygon
At this point, you should be able to see your paddock shapes on the screen, and should be able to ‘select’ them one at a time by clicking in them.
Note: the program can calculate your paddock area from this image, tick “Auto-Area” on and select two decimals places (highest accuracy) in the drop-down box. This will override any existing paddock areas in your client file. Use with caution.
Existing Paddock Names
- Ensure you are on the Edit tab
- Click “Select Tool” pointer from top toolbar
- Left click on first paddock
- Use drop down arrow next to Paddocks to select from existing names (double click) or refer to New Paddock Names below as required
- Repeat for additional paddocks
New Paddock Names
- Ensure you are on the Edit tab
- Click “Select Tool” pointer from top toolbar
- Left click on first paddock
- Type in new name next to Paddock Name
- Hit Enter
- Click Yes to add to Paddock Master
- Repeat for additional paddocks
Assign Coordinate System
This is important to reference your images, according to ‘zone’ based on the longitude of your farm. Paddocks must be assigned with names before this step occurs, or they will not be saved. If your image already shows Eastings and Northings you do not need to complete steps below.
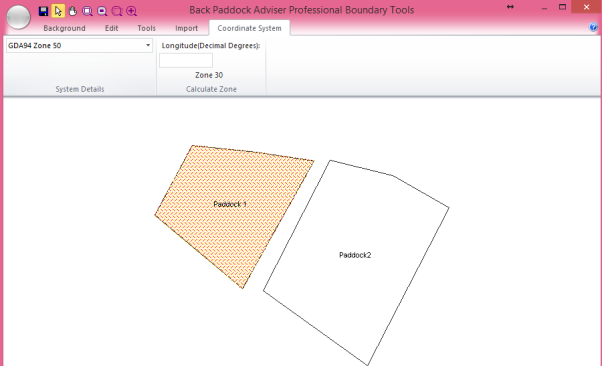
- Click on Coordinate System
- Discover Longitude
- Hover mouse over entire farm from left to right, “Long” values will change as you roll
- Keep note of longitude, if over two choose that with largest area
- Enter longitude into toolbar
- Click Calculate Zone
- Use drop down box on left to select calculated Zone
- Click OK when notified of successful change
- Click Save
If you are setting your coordinate system for multiple farms (for example, if Maps have been created in the App) this should be set for each farm individually.
You have now successfully Imported your Maps, assigned their Paddock Names and set the Coordinate system. You may now close the Mapping pop-up box by clicking the X in the top right corner to return to the main Adviser program.