Map Farm in Google Earth, Export Polygons as KML files


The goal

Following this guide, we will successfully map paddock boundaries in Google Earth and import them into Adviser, assigning them the correct name. This will be used throughout the Adviser program for a visual representation of the Farm area, and to create ‘layers’ as required to represent required parameters. The accuracy of these images and the correct alignment of polygons and background imagery depend on user precision matching Reference Points between Google Earth and Adviser, and correct co-ordinate transference. Time to flex those mouse-clicking fingers! Let’s get started.


Summary of process

Please find below a summary of the process to successfully Import KML files, calculate area (if required) and allocate names:

  1. Prepare Google Earth for use
  2. Create Farm folder
  3. Create Paddock Polygons, save to Farm folder
  4. Export whole farm as a KML file
  5. Import KML file into Adviser through Farm tab
  6. Tick Auto-Area if required (calculates hectares from KML file for whole file)
  7. Allocate Paddock Names
  8. Set Co-ordinate System
  9. Save changes

At this point, you are ready to go!


Google Earth - Export

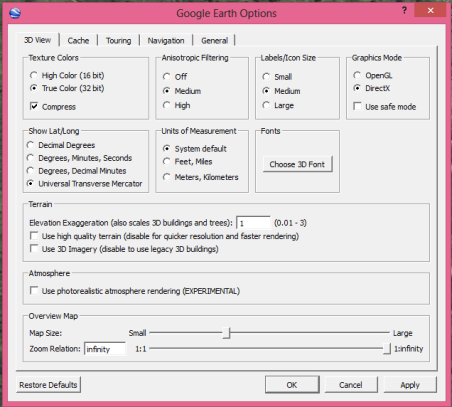
Firstly, we need to prepare Google Earth. Open the program, and ensure that the program is ready by completing steps below:

  1. Left click on Tools from top toolbar
  2. Left click on Options
  3. Change “Show Lat/Long” in 3D View tab to Universal Transverse Mercator (shown above)
  4. Click OK
  5. Left click on View from top toolbar
  6. Ensure that Tour Guide is not ticked, Left Click to untick if required

We are now ready to start a new Farm Folder.


Create new Farm Folder in Google Earth


  1. Right click on “My Places” centre left on your screen
  2. Left click on “Add”
  3. Left click on “Folder”
  4. Give Folder the correct Farm name (eg. Farm1)

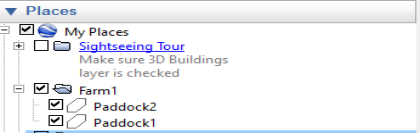
We are ready to populate the Farm Folder with polygons of our paddocks.


Create a Paddock Polygon

  1. Using “search” bar, search for your farm location in Google Earth
  2. Zoom in as much as possible so first paddock is on screen

Note: Ensure that orientation is due North

  1. Left click on Farm Folder to highlight
  2. Right click on Farm Folder
  3. Left click on Add
  4. Left click on Polygon
  5. Give Polygon a name (eg. Paddock1)
  6. Left click once on each corner / angle of the paddock to create your polygon, in a clockwise or anti-clockwise direction
  1. Zoom in or out as required for best view by scrolling on your mouse
  1. Click OK when complete
  2. Repeat for additional Paddocks

Your paddocks are now created.


Save Farm for export

Our paddocks are all created, so it is time to export them as a group.

  1. Right click on Farm Folder
  2. Left click “Save Place As”
  3. Change file type to “kml”
  4. Navigate to appropriate folder, we suggest your Map folder (Documents\Back Paddock Company\Adviser\Maps)
  5. Change file name if required
  6. Left click Save


We are now ready to bring our new polygons into the Adviser program.